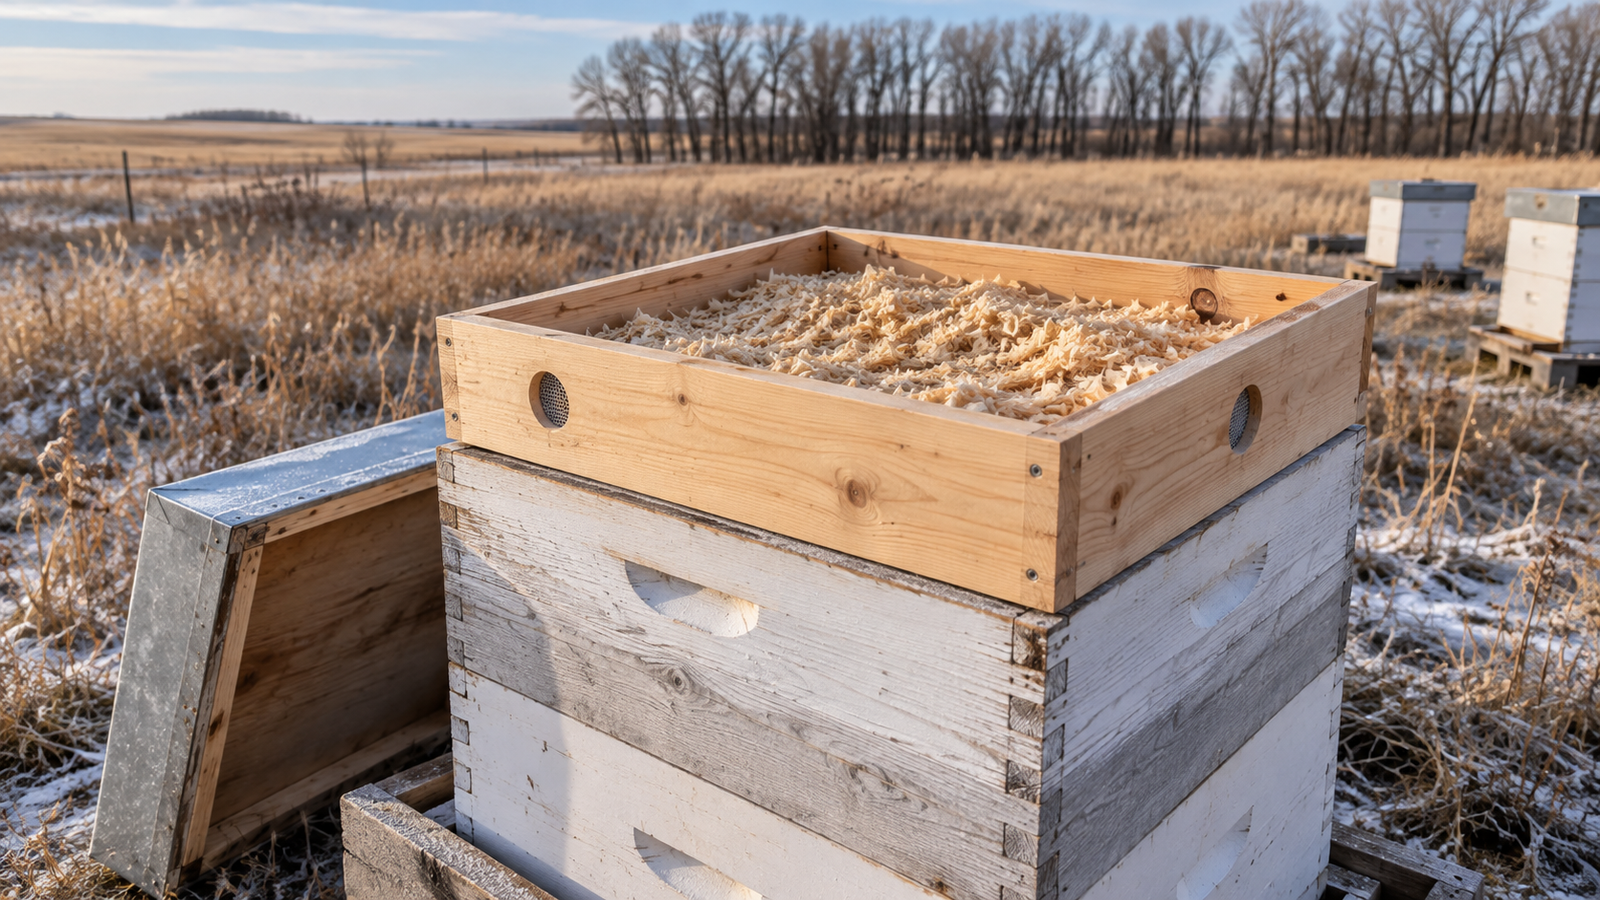
How to Build a Beehive Quilt Box
for Canadian Prairie Winters
Untreated, dry, coarse pine, spruce, or aspen wood shavings are the most widely used and recommended filling for a beehive quilt box on the Canadian Prairies. Coarse shavings allow air and moisture to move through the material rather than becoming trapped — which is what allows the quilt box to buffer moisture and eventually dry through the ventilation holes. Sawdust should not be used: its fine particle size causes compaction, which blocks airflow and prevents moisture from escaping. Burlap (hessian) is also suitable, either alone or in combination with shavings. The Alberta Beekeepers Commission cites wood shavings, burlap, cork, and similar absorbent materials as options for above-cluster moisture management in outdoor Prairie hives.
No — sawdust is not suitable for a quilt box. Its fine particle size causes it to compact under its own weight, which eliminates the air spaces that allow moisture vapour to pass through the material and escape through the ventilation holes. Compacted sawdust provides poor insulation and holds moisture rather than buffering and releasing it. Multiple commercial quilt box manufacturers — including Mann Lake and Meyer Bees — explicitly state not to use sawdust as a quilt filling for this reason. Use coarse pine or spruce shavings (the kind sold as animal bedding, not fine sawdust) as a substitute.
A wooden rim approximately 3 to 4.5 inches (7.5 to 11 cm) deep is sufficient for most DIY Prairie quilt boxes — deep enough to hold a useful layer of shavings while leaving clear space between the top of the shavings and the underside of the outer cover. There is no universal mandatory dimension: some commercial quilt boxes are shallower, while dedicated DIY builds may go deeper to add more insulation. A dedicated quilt rim is generally preferable to using a full shallow or medium super, which uses more material and adds unnecessary weight. The key functional requirement is that the shavings fill is below the ventilation holes and that the outer cover closes completely without compressing the material.
No — a quilt box ventilation hole is not an upper bee entrance, and the two should not be confused. Quilt box vent holes are above the hardware cloth screen that separates bees from the shavings — bees cannot reach or use them as an entrance. If you want an upper entrance for winter cleansing flights or in case the lower entrance is blocked by snow, it must be created separately — below the quilt box, in the hive body rim or inner cover — and sized to minimize cold air drafts while allowing bee passage. Some Prairie beekeepers add a notched upper entrance rim between the top brood box and the quilt box specifically for this purpose.
Emergency winter fondant or a sugar brick must go below the quilt box — directly on the top bars above the winter cluster — with a feeding shim tall enough to give bees access to it. The correct stack from top to bottom is: outer cover, quilt box, feeding shim (with fondant inside it on the top bars), brood box. The fondant must not touch the hardware cloth bottom of the quilt box, must not be buried in the shavings material, and the shavings must not be contaminated with syrup or sugar residue. A dedicated feeding shim creates the necessary clearance. Commercial Prairie quilt box suppliers explicitly recommend a separate spacer rim for emergency winter feeding rather than placing food inside or against the quilt material.
No — a quilt box is one approach to top insulation and moisture management, not a universal requirement. Hives that already use a functional insulated top cover or moisture board, hives wintered indoors, or configurations that have been verified to remain dry through previous Prairie winters may not need a quilt box added. Adding a quilt box to an already functional winter system can sometimes block existing ventilation paths rather than improve them. The principle is to choose one coherent winter system and implement it correctly, rather than layering every available moisture-control product onto the hive simultaneously. That said, for outdoor Prairie wintering with standard Langstroth equipment and a telescoping outer cover, a well-built quilt box is a practical and widely used addition.
📋 In This Article
- How a Beehive Quilt Box Works
- Do You Need a Quilt Box on a Prairie Hive?
- Choose the Configuration Before Building
- Materials and Tools Needed
- Quilt Box Dimensions and Vent Placement
- How to Build a Beehive Quilt Box Step by Step
- How to Install the Quilt Box on the Hive
- Adding Emergency Winter Feed Below a Quilt Box
- Winter Inspection and Maintenance
- Common Quilt Box Mistakes
- Quilt Box vs. Moisture Board vs. Insulated Cover
- Final Prairie Winter Checklist
This guide is written primarily for beekeepers in Alberta, Saskatchewan, and Manitoba overwintering Langstroth hives outdoors. A Prairie winter combines very low temperatures, significant temperature swings, and extended colony confinement — conditions where top insulation and moisture management above the cluster matter more than in milder Canadian regions.
A Quilt Box Cannot Fix Underlying Colony Problems
A quilt box cannot compensate for uncontrolled Varroa, inadequate winter stores, a weak or queenless colony, or a leaking outer cover. These must be addressed before installing any winter insulation system. A well-built quilt box on a colony that entered winter in poor condition will not prevent losses.
How a Beehive Quilt Box Works
A winter colony continuously generates heat and moisture. Bees metabolize their honey stores to maintain cluster warmth, producing water vapour as a byproduct. This warm, moist air rises toward the top of the hive. If the surface directly above the cluster is very cold — as it can be under a standard telescoping cover in a Prairie winter — moisture can condense on that surface. Condensation on the hive walls is not automatically dangerous. The problem occurs when water accumulates and drips cold water directly onto the winter cluster below, or when persistent moisture creates conditions for mold growth in the hive.
Top Insulation
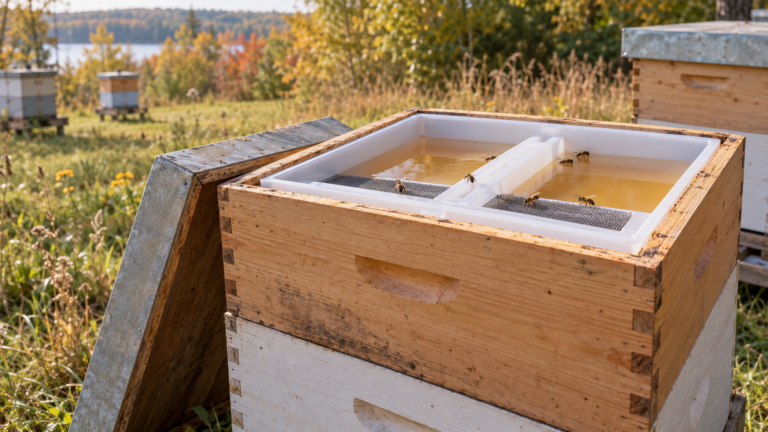
Shavings above the cluster reduce the temperature difference between warm cluster air and the overhead surface, lowering the chance of heavy condensation directly above the bees. The insulating value depends on shaving type, depth, and density — no specific R-value should be assumed.
Moisture Buffering
Shavings can temporarily absorb some moisture vapour rising from the cluster. This moisture must then escape through the vent holes over time. Shavings that remain permanently saturated lose insulating value and indicate the ventilation is insufficient or the material needs replacement.
Vent Holes — Not Bee Exits
Lateral vent holes sit above the hardware cloth screen that separates bees from the shavings. They allow the shavings to dry gradually. They are not upper entrances — bees cannot reach them. A separate upper entrance requires its own opening below the quilt box.
The Correct Way to Describe What a Quilt Box Does
A quilt box does not simply “vent all moisture out.” Its main job is to insulate the space above the winter cluster, reduce cold overhead surfaces, and provide a breathable, moisture-buffering layer. The vent holes allow the buffer material to dry — they are not the primary mechanism for removing all hive moisture.
Do You Need a Quilt Box on a Canadian Prairie Hive?
Consider a Quilt Box If:
- Hives overwinter outdoors in Alberta, Saskatchewan, or Manitoba
- Previous winters showed condensation or wet inner cover under the outer cover
- The winter wrap system allows controlled upper moisture escape
- You want additional top insulation above standard wrapping
- You are using standard Langstroth equipment with a telescoping outer cover
Skip the Quilt Box If:
- Already using a verified functional insulated top cover or moisture board
- Hives are overwintered indoors where external temperature is managed
- Existing configuration has been verified dry in multiple Prairie winters
- Adding a quilt box would block existing ventilation paths in your setup
- Your wintering system supplier recommends a different approach
Choose One Coherent System — Do Not Stack Everything
More components do not automatically produce a better wintering system. Airflow, insulation, and entrances must work together. Adding a quilt box to an already functional insulated cover setup may block the ventilation that cover relies on. Decide on one system before building or buying anything.
Choose the Quilt Box Configuration Before Building
There is more than one way to configure a quilt box into a Prairie winter setup. The components cannot be placed in random order — each position affects airflow, moisture movement, and bee access to any emergency feed. Confirm which configuration matches your equipment before cutting any wood.
- Outer cover (telescoping)
- Quilt box — screen side down
- Optional: feeding shim / upper entrance rim
- Top brood or honey box
- Lower brood box
- Bottom board
- Outer cover (telescoping)
- Quilt box — screen side down
- Inner cover — must have open moisture path
- Optional: feeding spacer
- Top brood box
- Bottom board
A Solid Inner Cover Blocks the Quilt From Working
If you use an inner cover with no open moisture path between the brood box and the quilt box, warm moist air cannot reach the shavings — the quilt material cannot buffer or absorb anything it cannot contact. In Configuration B, the inner cover must have an opening (such as the standard notch or a hole) that allows vapour to pass upward into the quilt. Confirm this before installing.
Materials and Tools Needed
Recommended Materials
- Shallow wooden rim or dedicated quilt rim — 8 or 10 frame Langstroth compatible
- 1/8-inch galvanized hardware cloth for the screen bottom
- Fine corrosion-resistant mesh to cover vent holes
- Galvanized or stainless staples for screen attachment
- Exterior wood screws for frame assembly
- Exterior paint for outer surfaces only — let dry fully before use
- Coarse, dry, untreated pine, spruce, or aspen shavings
- Optional: untreated burlap/jute bags to keep shavings contained
- Optional: feeding shim if emergency feed is planned
Do Not Use
- Fine sawdust — compacts and blocks airflow
- Wood dust or sanding residue
- Shavings from treated, painted, or glued wood
- MDF, OSB, or shredded plywood
- Damp or wet material of any kind
- Loose insulation that can fall between frames
- Fibres or synthetic materials that may block vent mesh
- Strongly aromatic cedar as a standard recommendation — not appropriate as the default choice
Tools Required
Tape measure, pencil, drill, hole saw set (for ventilation holes), staple gun, wire cutters, screwdriver, sandpaper, and eye and hand protection for cutting and stapling operations.
Quilt Box Dimensions and Vent Placement
Match the Hive Footprint
Build or source a quilt box that exactly matches your hive’s footprint — an 8-frame quilt box for an 8-frame hive, a 10-frame quilt box for a 10-frame hive. The edges must align with the hive body to prevent gaps that admit cold air and pests. The outer cover must close completely with the quilt box installed. Mismatched dimensions defeat the purpose of the insulation layer.
Box Depth
A rim approximately 3 to 4.5 inches (7.5 to 11 cm) deep provides adequate space for a useful shavings layer while keeping the overall hive height manageable. A dedicated quilt rim uses less material and weighs less than a full shallow super repurposed as a quilt box — either works as long as the depth allows shavings below the vent holes with clear space above them to the outer cover underside.
Vent Size and Position
Start with two opposing vents — one on each of two opposite walls — rather than holes on all four sides. Approximately ½ to ¾ inch per vent hole is adequate for most DIY Prairie quilt boxes. Commercial products vary: some use two ¾-inch vents, others use three holes — this variation confirms there is no single universally correct dimension. Position vents near the top of the quilt box side walls, above the intended shavings fill level. Cover each hole with mesh on the inside. Ensure the telescoping outer cover edge does not block the vents and that the winter wrap does not cover them. Protect vent openings from direct rain and the prevailing wind direction.
How to Build a Beehive Quilt Box Step by Step
How to Install the Quilt Box on the Hive
Install After Major Fall Work Is Complete
The quilt box is one of the final components added before winter wrapping — not an early-season installation. Install it after: the fall colony assessment is complete, liquid syrup feeding has finished and feeders have been removed, Varroa treatments have been applied and strips removed on schedule, and the winter configuration has been decided. No single installation date applies across all Prairie provinces — install when the hive’s fall preparation is complete and wrapping is imminent.
Keep the Quilt Vents Open Through Winter
Do not cover vent holes with plastic film, tar paper, or winter wrap material. The vents must remain open to function. Protect them from the prevailing wind direction and from direct precipitation — a small external deflector helps — but they must breathe. Verify the outer cover does not shift and block a vent during winter, particularly after heavy snowfall.
Add a Separate Upper Entrance If Needed
If you want an upper bee entrance for cleansing flights or as a backup when the lower entrance is snow-blocked, create it separately below the quilt box — in a notched rim, inner cover, or hive body entrance — and size it to limit cold air drafts. Orient it away from the prevailing wind direction. Protect it against mice with a metal guard if it will remain open all winter. Do not assume the quilt box vent holes serve this function.
Adding Emergency Winter Feed Below a Quilt Box
Use a Feeding Shim — Not Direct Contact With the Screen
Emergency fondant or sugar bricks must not touch the hardware cloth bottom of the quilt box and must not be placed inside or on top of the shavings material. The correct approach is to place a feeding shim — a wooden spacer rim of adequate height — between the top brood box and the quilt box, with the fondant sitting on the top bars inside that shim directly above the winter cluster.
- Outer cover
- Quilt box (screen side down)
- Feeding shim (fondant on top bars inside)
- Top brood / honey box
- Lower brood box
- Bottom board
- Fondant directly above the cluster
- Not blocked by inner cover or quilt screen
- Not touching the hardware cloth
- Shim tall enough for bee access
- Shavings must not contact the feed
- No syrup near quilt material
Winter Inspection and Maintenance
Do Not Open Brood Boxes Unnecessarily
During Prairie winter, external inspections are all that is needed for routine monitoring: check that vent holes are clear, remove snow blocking the entrance, verify the outer cover and wrap have not shifted, and note any unusual activity. Opening brood boxes in cold weather releases the cluster’s accumulated warmth and risks chilling bees — avoid it unless there is a specific problem requiring intervention.
When to Check the Quilt Material
Check the shavings only on a calm, milder winter day — above approximately -5°C — by lifting the outer cover briefly without removing the quilt box itself. A slightly damp top layer of shavings is normal and does not require immediate action. Saturated, moldy, or heavily compacted material that cannot dry through the vents should be replaced when conditions allow.
When to Replace the Shavings
Replace the shavings if they are saturated, show visible mold, were wetted by rain or snow infiltration through a damaged cover, or are so compacted that they can no longer allow airflow. A slightly damp upper zone does not automatically require full replacement — assess how much of the material is affected and whether the vents are functioning. Replace with fresh dry material and investigate what caused the excess moisture.
Spring Removal
Remove the quilt box when the winter configuration is no longer needed — typically when daytime temperatures are consistently above freezing and the colony is actively foraging. Dry or replace the shavings, clean the hardware cloth mesh, check for propolis buildup on the screen, and repair any wood or mesh damage. Store the box in a dry location away from pests.
Common Quilt Box Mistakes
✗ Mistakes to Avoid
- Using sawdust instead of coarse shavings — sawdust compacts and blocks airflow
- Filling shavings above the vent holes — the vents must remain unobstructed
- Compacting the shavings tightly — they must remain loose to allow moisture movement
- Allowing the outer cover or winter wrap to block the vent holes
- Installing mesh over vent holes on the exterior only — install it on the interior where it protects without blocking airflow from outside
- Using hardware cloth that is inadequately stapled — it must support the shavings weight without sagging over a full Prairie winter
- Using treated, painted, or glued wood shavings — untreated only
- Using quilt box vent holes as bee upper entrances — they are above the screen bees cannot cross
- Installing over a solid inner cover with no moisture path — warm air cannot reach the shavings
- Placing fondant directly on or through the hardware cloth screen without a feeding shim
- Opening the hive repeatedly through winter to “check the shavings”
- Relying on a quilt box to compensate for a weak colony or inadequate winter stores
Quilt Box vs. Moisture Board vs. Insulated Cover
| System | Top Insulation | Moisture Buffering | Maintenance | Best For |
|---|---|---|---|---|
| Quilt Box | Good — varies with depth | Yes | Check shavings seasonally | DIY, outdoor Prairie wintering |
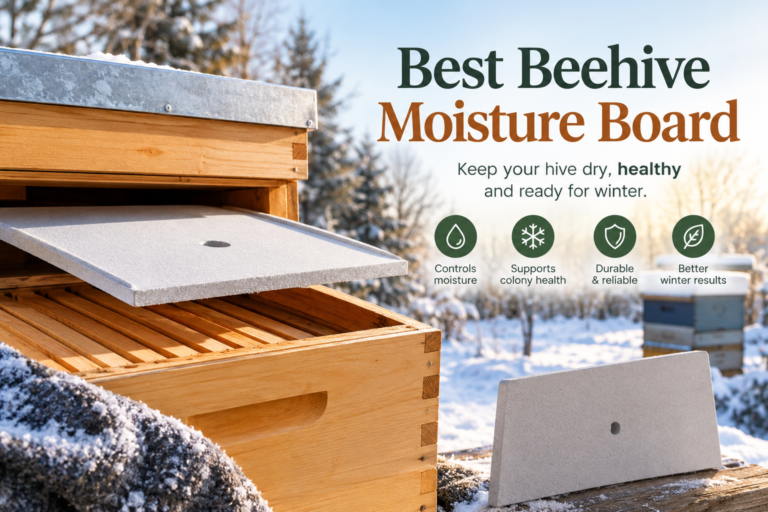
| Moisture Board | Moderate | Yes | May need replacement | Compact setups, commercial operations |
| Insulated Cover | High | Not necessarily | Low | Preventing cold overhead surface |
| Quilt + Insulated Cover | High | Yes | More complex | Verified systems for severe cold |
More Components Do Not Automatically Mean Better Wintering
Airflow, insulation, and entrances must work together as a coherent system. Adding a quilt box on top of a system already designed around a different moisture-management approach can disrupt the existing airflow rather than improve it. Choose one system, understand how it works, and implement it completely.
Final Canadian Prairie Winter Checklist
☐ Before Wrapping — Quilt Box Verification
- Quilt box matches the hive’s 8 or 10 frame footprint exactly with no gaps at the edges
- Hardware cloth bottom is securely stapled on all sides and does not sag
- Only untreated, dry, coarse shavings (pine, spruce, or aspen) are used as fill
- Shavings fill remains below the ventilation holes — vents are completely clear
- Vent holes are screened on the interior side and protected from prevailing wind and rain
- Outer cover closes completely without compressing the shavings
- Winter wrap does not cover or block the vent holes
- Any upper bee entrance is separate from quilt vents and positioned below the quilt box
- If emergency feed is planned, a feeding shim of adequate height is in place — fondant does not contact the hardware cloth
- Hive stores, colony strength, and Varroa mite levels were assessed and addressed before installing the quilt box
- The complete winter configuration has been checked for gaps, misaligned edges, and potential water entry points
Final Thoughts
A well-built quilt box can add valuable top insulation and moisture buffering to an outdoor Prairie wintering system. Its success depends less on achieving a perfect hole diameter and more on three things that are fully within a beginner’s control: using dry, untreated, coarse material that can move moisture; keeping the vent holes open and protected so the material can dry; and integrating the quilt box correctly with the hive’s outer cover, winter wrap, and entrances so all components work together rather than against each other.
Build it solidly, test it on an empty box before putting it on a hive, fill it loosely, and check it once mid-winter on a calm day. That is the full maintenance requirement for a well-constructed quilt box. The heavier work — Varroa, stores, colony strength — happens in August and September, before the quilt box ever goes on. 🐝❄️🍂
Questions about your Prairie winter setup? 🐝
Describe your hive configuration, province, and current setup to our AI assistant — we’ll help you decide whether a quilt box fits your specific wintering system.
🐝 Ask Bee Now — It’s Free🐝 WiseBee Disclosure
Affiliate Disclosure: This article contains Amazon affiliate links. If you purchase through our links, we earn a small commission at no extra cost to you. Learn more →
Disclaimer: This article is for educational purposes only and does not constitute professional apicultural or veterinary advice. Always consult a qualified beekeeper for guidance specific to your situation. Full disclaimer →