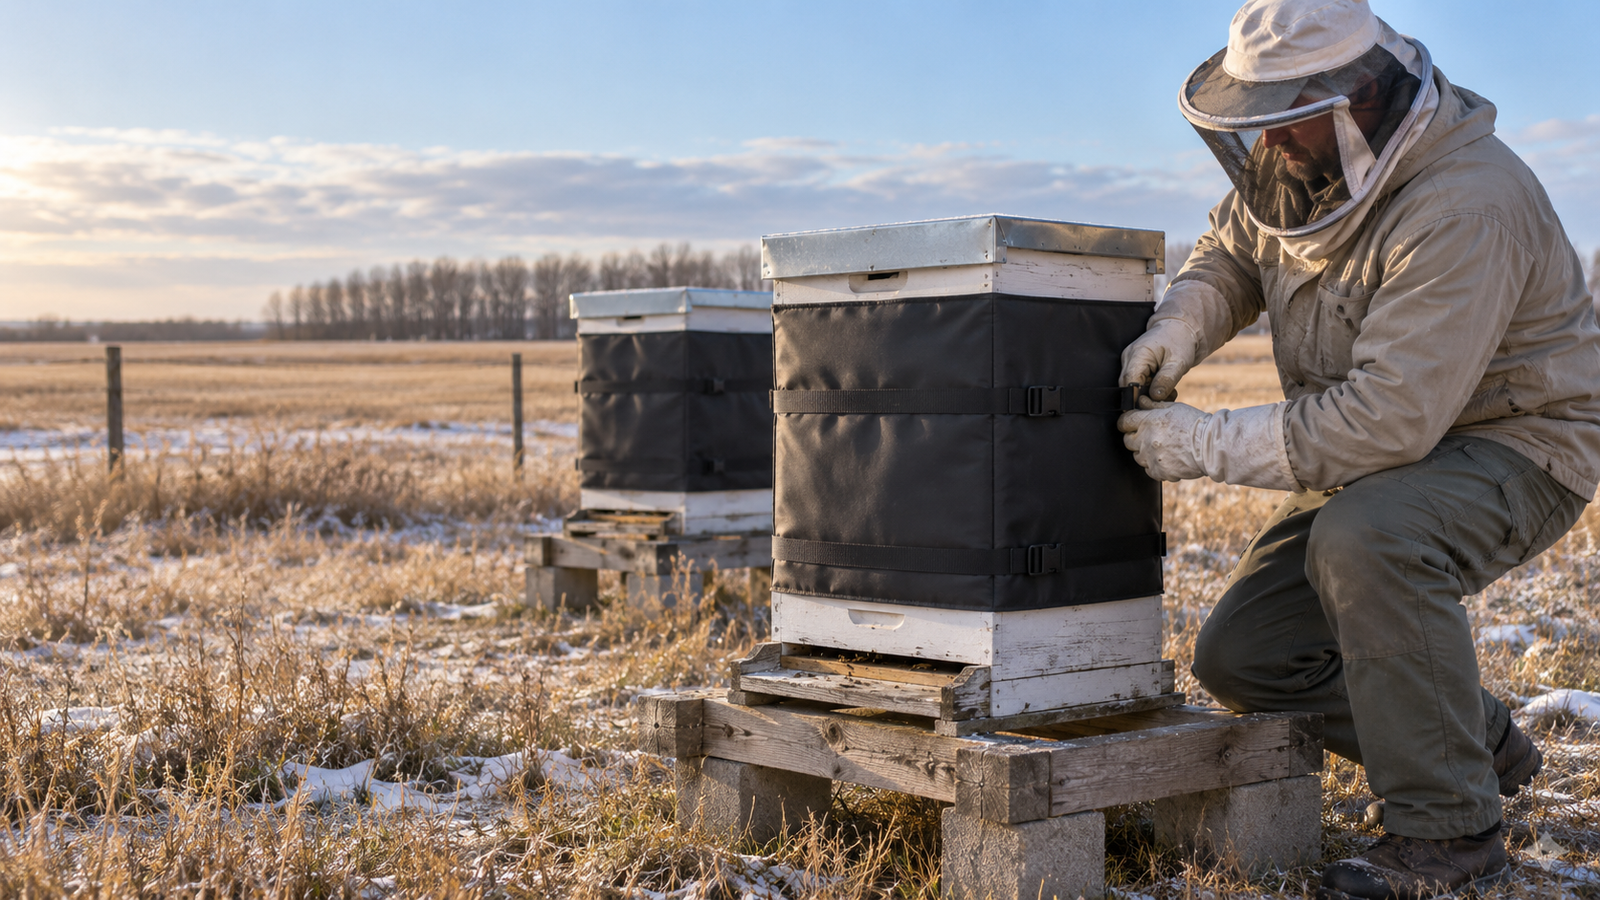
How to Wrap Beehives for Winter in Alberta:
Poly Wraps, Tar Paper and the Prairie Wrapping Guide
Yes — most Alberta beekeepers who overwinter colonies outdoors wrap their hives. Alberta’s Prairie winters regularly produce sustained temperatures of -20°C to -40°C with significant wind chill, and the freeze-thaw cycles associated with Chinook events create additional thermal stress on colonies. Wrapping reduces heat loss from the outer hive surfaces, moderates temperature swings during Chinook events, and provides an additional layer between the colony and ambient conditions. The Alberta Beekeepers Commission recommends protective wrapping for outdoor overwintering as standard practice. Hives wintered indoors in a cold room do not require external wrapping.
Insulated polyethylene foam wraps — commonly called poly wraps — are the most widely used and recommended option for Alberta outdoor hive wintering. They provide meaningful insulation value, are reusable for multiple seasons, allow quick installation, and can be purchased pre-sized for standard Langstroth 8 and 10 frame hives. Corrugated plastic wraps and poly foam boards cut to size are also used. Tar paper (roofing felt) is a traditional and still widely used option — it is inexpensive, easy to source, and reduces wind exposure, but provides significantly less insulation than poly foam and must be replaced annually or every two seasons as it degrades. For Alberta’s severe winter conditions, most beekeepers prefer poly insulation wraps over tar paper alone.
Wrap Alberta beehives when daytime temperatures are consistently below 10°C and the colony is no longer actively foraging — typically early to mid-October in central Alberta, earlier in northern regions. All fall preparation must be complete before wrapping: Varroa treatment removed on schedule, liquid syrup feeding finished, mouse guards installed, and fondant or candy board placed above the cluster if stores are below target. Wrapping too early (while bees are still foraging actively in warm weather) can increase hive temperature and encourage bees to break cluster prematurely on warm days. Wrapping too late (after severe cold has arrived) risks disturbing the cluster during vulnerable early winter confinement.
The bottom entrance should be reduced to a small opening — typically 1-2 cm wide — rather than fully closed, for two reasons. First, bees need an opening for cleansing flights on mild winter days when temperatures briefly rise above 10°C. Second, winter mortality produces dead bees that accumulate on the bottom board and must be able to fall or be removed without blocking the entrance entirely. A metal mouse guard with 8-9mm holes serves as both a mouse exclusion device and an appropriately reduced entrance. Monitor the entrance after heavy snowfall — snow can block even a reduced entrance completely, which must be cleared to prevent carbon dioxide buildup and enable cleansing flights when temperatures allow.
Wrapping method varies by wrap type and beekeeper preference. For pre-made poly foam wraps designed for Langstroth hives, the wrap typically goes around the outside of the hive body below the outer cover — the outer cover then sits on top and is sometimes secured with a strap or weight. For tar paper wrapping, the paper is wrapped around all four sides of the hive body and secured with staples or thumb tacks, with the outer cover on top. In both cases, the outer cover remains in place as the primary rain and snow shield. The wrap does not replace the outer cover. Ensure the upper ventilation openings (quilt box vents or upper entrance) are not blocked by the wrap material when finalizing the winter configuration.
📋 In This Article
- Why Alberta Hives Need Winter Wrapping
- Poly Insulation Wraps vs Tar Paper — Which Is Better for Alberta?
- When to Wrap — The October Alberta Deadline
- Complete Before Wrapping — The Pre-Wrap Checklist
- How to Wrap a Beehive for Winter Step by Step
- Ventilation During Wrapping — What Must Stay Open
- The Chinook Problem — Wrapping and Temperature Swings
- Common Wrapping Mistakes
- Spring Unwrapping — When and How
- Alberta Winter Wrapping Checklist
Wrapping a beehive for a Prairie winter is not a substitute for fall preparation — Varroa control, winter stores, and colony strength all matter more than what goes on the outside of the hive. But once those fundamentals are in order, a properly wrapped hive gives an Alberta colony a measurably more stable thermal environment through a five-to-six month outdoor winter that regularly drops to -30°C and below.
Why Alberta Hives Need Winter Wrapping
A Langstroth hive is a wooden box designed for warm-weather management — not for Prairie winters. Standard wooden hive bodies provide minimal insulation against -30°C temperatures, and the large surface area of a two-box hive loses heat rapidly to Alberta’s cold, dry winter air. The winter cluster generates its own heat by metabolizing honey stores, but the rate at which stores are consumed is directly related to the temperature differential between the cluster interior and the ambient air outside the hive.
A wrap reduces that differential — the space between the cluster and the outside air is no longer a single thin wall of wood. This does not mean the hive becomes warm: the cluster interior still operates at cluster temperature and the bees still regulate their own heat production. What changes is the rate at which the hive loses that heat to the outside. A colony in a wrapped hive expends fewer calories maintaining cluster temperature through a -35°C night than the same colony in an unwrapped hive — those saved calories translate directly into more stores remaining in April.
What Wrapping Does — and Does Not Do
Wrapping reduces heat loss and moderates temperature swings. It does not heat the hive, replace the colony’s own thermoregulation, compensate for inadequate stores, or protect against Varroa damage already done to the winter bee generation. A strong, well-fed, low-Varroa colony in a wrapped hive has the best winter survival odds. A weak or Varroa-damaged colony in a wrapped hive will still fail.
Poly Insulation Wraps vs Tar Paper — Which Is Better for Alberta?
- Meaningful insulation value — reduces heat loss significantly
- Reusable for 3-5+ seasons with proper storage
- Pre-sized versions available for 8 and 10 frame hives
- Quick installation — Velcro or strap fastening
- Withstands Chinook temperature swings better than tar paper
- Higher upfront cost — lower long-term cost per season
- Very low cost per hive — widely available at hardware stores
- Reduces wind exposure and provides modest solar gain on sunny days
- Minimal insulation value — primarily a wind and moisture barrier
- Must be replaced annually or every two seasons as it degrades
- Labour-intensive — stapling required each season
- Adequate in mild Prairie winters; less effective in sustained extreme cold
Commercial Alberta Operations Predominantly Use Poly Wraps
Large Alberta commercial operations overwinter colonies in insulated poly wraps or purpose-built insulated boxes rather than tar paper — the labour savings of reusable wraps and the insulation difference across hundreds of hives make poly the practical standard. For hobbyist and sideliner beekeepers, the upfront cost of poly wraps is typically recovered in 2-3 seasons compared to annual tar paper replacement, and the insulation performance is meaningfully better for Alberta’s winter severity.
When to Wrap — The October Alberta Deadline
Complete Before Wrapping — The Pre-Wrap Checklist
Wrapping is the last step in a sequence — not an independent task. Every item below must be complete before the wrap goes on. Once a hive is wrapped for winter, it should not need to be opened again until spring unless a specific problem requires emergency intervention.
☐ Complete Before Wrapping
- Varroa treatment strips removed on schedule — post-treatment alcohol wash below 1%
- All honey supers removed — no extractable supers remain on the hive
- Liquid syrup feeding complete — feeders removed and stored
- Colony weight at or above target — 40-42 kg stores for a two-box Alberta colony
- Fondant or candy board installed above the cluster if stores are below target
- Metal mouse guard installed — lower entrance reduced to mouse-guard width
- Queen confirmed present and laying in August/September inspection
- Quilt box installed with clear vents — if using a quilt box system
- Upper entrance confirmed open and not blocked by wrap material
- Outer cover secured — strap or weight in place against Chinook winds
How to Wrap a Beehive for Winter Step by Step
For Poly Foam Insulation Wraps
For Tar Paper Wrapping
Cut roofing felt (15 lb tar paper) into strips long enough to wrap around all four sides of the hive body with a 10-15 cm overlap. Wrap from the bottom board up to the outer cover — covering all four hive body sides. Staple firmly on all edges with galvanized staples at 15-20 cm intervals. Fold and staple the corners neatly to minimize gaps. Leave the entrance opening and any upper entrance/vent positions clear. Place the outer cover on top and secure with a weight or strap. Tar paper degrades in UV and freeze-thaw cycling — inspect for tears and gaps mid-winter when possible, and plan to replace annually or every other season.
Ventilation During Wrapping — What Must Stay Open
Reduced to mouse guard width — 1-2 cm. Never fully closed. Monitor for snow blockage after storms.
Both opposing vent holes must remain clear of wrap material. These dry the shavings and allow moisture vapour to escape.
Notch or small opening below the quilt box — sized to minimize cold drafts while allowing cleansing flights and backup access.
A solid inner cover without a moisture path prevents quilt box function — ensure any inner cover used has an open passage for vapour movement.
The Chinook Problem — Wrapping and Temperature Swings
Alberta’s Chinook events — warm, dry winds that can raise temperatures by 20°C or more within hours — create a specific challenge for wrapped hives. A Chinook in January can push temperatures from -25°C to +10°C in a single afternoon. Bees inside a well-insulated wrapped hive respond to the warming by increasing activity, potentially breaking cluster and consuming additional stores in a disoriented warm-weather response during what is biologically still deep winter.
The wrap moderates this problem rather than creating it — an unwrapped hive experiences more extreme temperature swings than a wrapped one. However, some beekeepers in severe Chinook zones use breathable poly wraps rather than tightly sealed foam panels specifically to allow some temperature equilibration during Chinook events. The outer cover being secured against wind is critical during Chinooks — these events bring strong gusts that can displace an unsecured cover.
Check Your Hives After Every Chinook Event
After a significant Chinook — especially those combined with high winds — walk your apiary and verify: outer cover is still in place and secured, wrap has not shifted or partially detached, entrance is clear and not blocked by debris, and quilt box vents are unobstructed. A few minutes of post-Chinook inspection prevents discovering a displaced cover after temperatures have dropped again to -25°C. See also our guide on wind protection and hive securing for Alberta →
Common Alberta Wrapping Mistakes
✗ Mistakes to Avoid
- Wrapping before fall preparation is complete — Varroa treatment, feeding, and mouse guard must come first
- Covering the entrance with wrap material — bees must be able to exit for cleansing flights
- Blocking quilt box vents with wrap — moisture accumulates and cannot escape
- Not securing the outer cover — Chinook winds remove unsecured covers quickly
- Using a single layer of tar paper in severe Alberta winters expecting it to perform like poly insulation
- Wrapping too early while bees are still actively foraging in warm weather
- Not monitoring the entrance after heavy snowfall — snow blocks entrances completely
- Opening the wrapped hive repeatedly through winter to “check” — breaks cluster heat retention
- Using plastic film or vapour barrier that prevents any moisture exchange — can trap condensation
- Assuming a wrapped hive needs no further attention until April — entrances need monitoring after every major snow or wind event
Spring Unwrapping — When and How
Remove the winter wrap when daytime temperatures are consistently reaching 10°C or above and bees are taking regular cleansing flights. In Alberta this typically occurs in late March to mid-April depending on the year and region. Do not unwrap based on the calendar alone — wait for consistent warm daytime temperatures and observe bee flight activity before removing the wrap.
Unwrap on a calm, warm morning. Remove the outer cover strap or weight first, then slide or unfasten the wrap. Inspect the wrap for damage — tears, UV degradation, or moisture damage to poly foam reduce its effectiveness next season. Dry and store poly wraps in a clean, dry location away from rodents. Discard tar paper that has become brittle, torn, or heavily degraded. Conduct the spring colony inspection within the first warm week after unwrapping to assess winter survival, cluster size, stores remaining, and queen status.
Alberta Winter Wrapping Checklist
☐ Complete Before and During Wrapping
- All August and September preparation complete — Varroa, feeding, mouse guard, queen assessment
- Colony at or above 40-42 kg target winter weight — fondant installed if below target
- Quilt box installed with clear vents (if using quilt box system)
- Wrap type selected — poly foam for best insulation, tar paper as budget alternative
- All four hive body sides covered by wrap material
- Entrance opening in wrap aligned with hive entrance and mouse guard
- Quilt box vents not blocked by wrap material
- Upper entrance (if used) accessible and not covered by wrap
- Outer cover in place and secured with strap or weight against Chinook winds
- Winter monitoring plan in place — entrance cleared after each major snowfall
Final Thoughts on Wrapping Alberta Beehives for Winter
The Alberta beekeeper who reaches wrapping day with strong colonies, adequate stores, low Varroa, and functioning queens has done the hard work. Wrapping is the final layer — important, but it amplifies good preparation rather than compensating for inadequate preparation. A poly foam wrap on a well-prepared colony is a meaningful advantage through a Prairie winter. The same wrap on a colony heading into winter with high Varroa and depleted stores is insufficient to change the outcome.
Wrap in October. Secure the outer cover. Clear the entrance after snowfalls. Minimize disturbance until spring. The colony knows what to do — your job in winter is to give it the best possible conditions and then let it work. 🐝❄️🍂
Questions about your Alberta winter wrapping setup? 🐝
Describe your hive configuration, wrap type, and apiary location to our AI assistant — we’ll help you confirm your winter configuration is complete before the first serious cold arrives.
🐝 Ask Bee Now — It’s Free🐝 WiseBee Disclosure
Affiliate Disclosure: This article contains Amazon affiliate links. If you purchase through our links, we earn a small commission at no extra cost to you. Learn more →
Disclaimer: This article is for educational purposes only and does not constitute professional apicultural or veterinary advice. Always consult a qualified beekeeper for guidance specific to your situation. Full disclaimer →